How to Apply Concealer for Beginners
Introduction
A. Explanation of the importance and benefits of using concealer
How to apply concealer for beginners?Concealer is one of the most versatile and hardworking products in any makeup routine. With just a few strategic strokes, it can brighten dull undereye areas, camouflage blemishes and redness, highlight and contour features, color correct discoloration – the list goes on. When used skillfully, concealer delivers transformative results in creating a smooth, even, flawless complexion.
B. Brief overview of different types of concealers (liquid, cream, stick, pen)
Today’s cosmetic aisles offer concealers in a variety of formulas – liquids, creams, sticks, and pens, each with unique pros and cons. Liquid concealers tend to be the most versatile and long-wearing. Cream versions can feel more emollient and moisturizing. Stick concealers are easy to apply right from the bullet but may settle into lines faster. Pen or wand applicators offer convenient, mess-free application.
C. Purpose of the guide – to simplify concealer application for beginners
As a beginner trying to master the art of concealer, the choices and techniques can quickly become overwhelming. That’s why I’ve compiled this comprehensive guide – to simplify flawless concealer application for anyone new to the world of complexion makeup. It covers everything from selecting the right formula to application methods that will have you achieving professional-looking results right from the start.
Choosing the Right Concealer
A. Understanding skin type (oily, dry, combination) and its influence on product choice
How to apply concealer for beginners?The first step is selecting a concealer suitable for your unique skin type and concerns. Those with oily skin may prefer a long-wearing, matte finish that won’t slip throughout the day. Dry skin beauties should opt for a hydrating, creamy formula that blends seamlessly into parched areas without enhancing texture. Combination skin requires finding a balance between oil control and hydration.
B. Matching skin tone and undertones
Getting the right shade match is also crucial. Concealer typically works best when it closely matches your skin’s undertones – pink for cool undertones, yellow for warm undertones, and neutral beige for olive complexions. When it comes to coverage, depth, and finish, test products on your actual skin to see how they perform before purchasing.
C. Identifying specific needs (dark circles, blemishes, redness, highlighting)
Consider what you’ll be using concealer for – dark circles, blemishes, redness, highlighting cheekbones, and so on. Look for formulas tailored to each concern. For example, hydrating concealers with brightening pigments work wonderfully for masking undereye shadows while matte, full-coverage versions excel at camouflaging blemishes.
Essential Tools & Preparation
A. The role of primer in prepping the skin
How to apply concealer for beginners?Proper prep is essential for achieving an airbrushed finish with concealer. Always start with a freshly cleansed, moisturized face, followed by a pore-smoothing primer. This gripping base allows concealer to adhere evenly and prevents it from settling into fine lines and texture.
B. Types of applicators (fingers, beauty sponges, brushes) and their uses
Have the right tools on hand for precise application and blending. Many people use their ring finger, as it applies the least amount of pressure. But beauty sponges work beautifully for seamless, streak-free blending, especially around the eyes. Small concealer brushes are ideal for targeted application on blemishes or for contouring and highlighting.
C. Hygiene tips for tools and products
Remember to clean makeup brushes and sponges regularly to prevent bacterial buildup. For tools like fingers, be sure to wash hands first. Never share or use concealer that looks or smells off to avoid any nasty infections.

Step-by-Step Application Techniques
1. Applying Concealer for Dark Circles
a. Color correcting with peach or green-tinted concealers
How to apply concealer for beginners?For masking blue-tinted dark circles or hyperpigmentation, start by applying a peach or warm green color corrector just to the shadowy areas. This will neutralize discoloration before layering a skin-toned concealer on top.
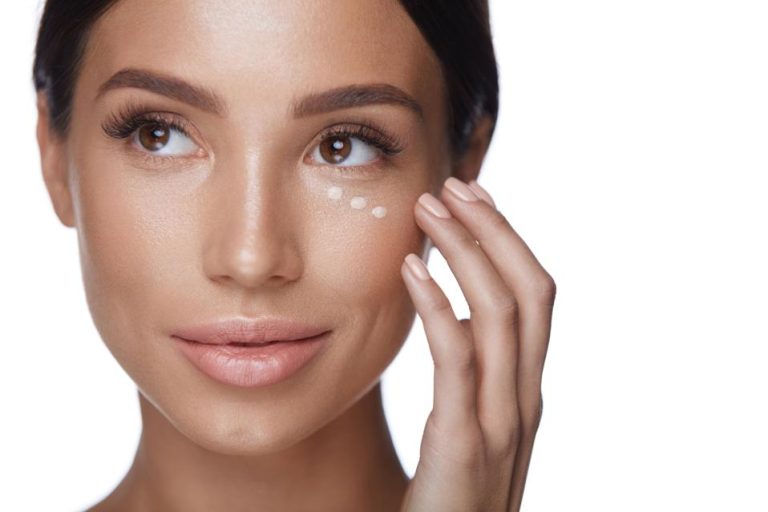
b. How to apply under-eye concealer in a triangle shape
To brighten the entire undereye area, apply concealer in an inverted triangle shape – start at the inner corners and gently blend outwards towards the temples. Focus more product right along the tear trough or depth of the shadow.
c. Setting with powder to prevent creasing
Use a damp makeup sponge to lightly press and diffuse concealer for a smooth, crease-free canvas. Then, set the area with a finely milled loose powder using a fluffy brush. This will lock everything in place for all-day wear.
2. Covering Blemishes and Redness
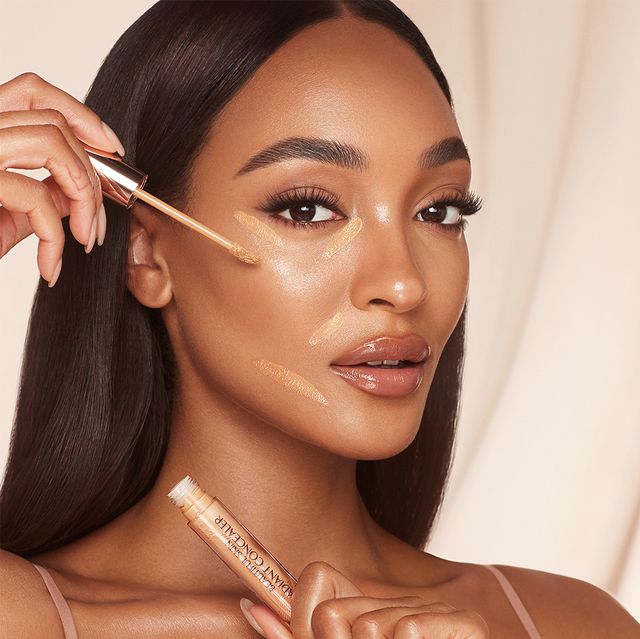
a. Using a small brush for precision
How to apply concealer for beginners?For concealing angry blemishes, redness, and discoloration, application precision is key. A small, firm concealer brush allows you to paint on a precise layer of full coverage product only where it’s needed.
b. Dabbing instead of rubbing for seamless coverage
Never rub concealer over blemishes as this tugs at the skin and smears product around. Instead, use a patting or stippling motion to gently build coverage until fully camouflaged. This prevents concealer from getting into pores and bleeding.
c. Layering for full coverage without cakiness
For stubborn acne spots or scars, layer concealer in thin coats rather than using one thick, heavy application. Start with a color-correcting greenish-toned concealer, then go over it with a skin-toned product. This sounds like more work but gives fuller coverage in a natural-looking way.
3. Highlighting and Contouring
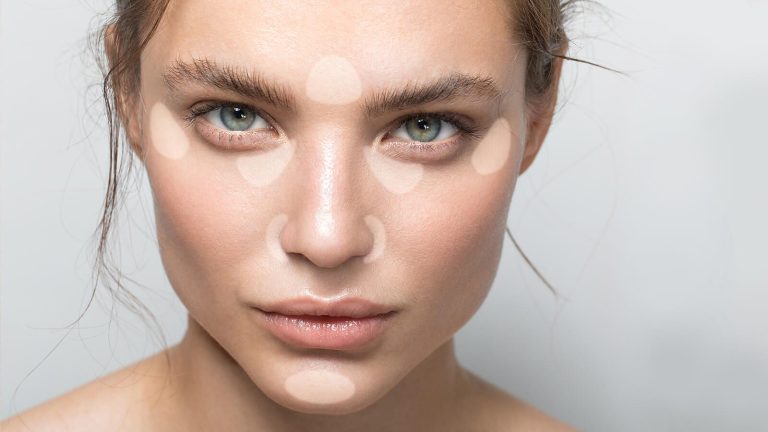
a. Choosing a lighter shade for highlighting
To highlight and brighten specific features like the cheekbones, down the center of the nose, and on the browbone, choose a concealer 1-2 shades lighter than your skin tone. A matte finish works best to reflect subtle light. Brightening formulas with light-diffusing pigments look extra dimensional.
b. Placement techniques for a lifted look
Apply highlighter concealer precisely where you want to create lift and depth – on the tops of cheekbones angled towards the temples, down the bridge of nose, under brow arch. Focus just on the high points rather than blending outwards for natural sculpting.
c. Blending seamlessly into foundation
For a natural blend, use a damp makeup sponge to lightly diffuse the harsh edges of highlighter concealer until it melds seamlessly with your foundation or skin. Never leave a stark line or you’ll lose the contoured effect. Take time to finesse a flawless transition of light to dark.

Common Mistakes and Fixes
A. Over-applying concealer
Using too much concealer is a common misstep. It’s meant to be a tactful spot treatment, not an allover base layer. Applying too much can make skin look flat and mask-like.
B. Not blending enough or properly
Swiping concealer somewhere and not blending properly will leave harsh lines and obvious spots of makeup. Always take time to diffuse edges into skin until there’s a seamless transition.
C. Using the wrong color or formula
Choosing a concealer in the wrong shade or undertone will look unnatural and unflattering. Likewise, using a drying matte formula on dry skin or vice versa will accentuate texture and lead to caking. Do proper testing before purchasing.
D. Remedies for common concealer mishaps
If concealer starts looking unnatural or cakey, try lightly patting the area with a damp beauty sponge to diffuse the edges and sheer it out. You can also press a light dusting of setting powder over top to control shine and blur edges. If you’ve used too much, try gently lifting some away with a clean fluffy brush.
Tips for Long-Lasting Wear
A. Setting your concealer correctly
Gently pressing a finely milled translucent powder over concealer using a damp beauty sponge or puff will help set it in place for all-day wear without creasing. You can also mist a setting spray over top to help powders blend even more seamlessly.
B. Touch-ups throughout the day
Although they are long-lasting, concealers may fade gradually over many hours of wear. Use blotting papers to remove any excess oil, then lightly tap concealer onto any areas needing freshening up. Focus on just the high points or shadow areas.
C. Layering skincare products for optimal wear
Well-prepped, hydrated skin is key for helping concealer adhere properly and maintain its perfected look. Make sure to use a hydrating primer underneath, and don’t forget to refresh makeup with an ultra-fine radiance mist to harmonize concealer with skin throughout the day.
Conclusion
A. Recap of key points
We’ve covered a lot – from choosing the right formula based on needs and skin type to application methods for masking dark circles, blemishes, and sculpting features. We’ve discussed essential tools, prep, hygiene, troubleshooting, and how to set concealer for lasting, natural-looking wear.
B. Encouragement to practice and experiment
As with most makeup skills, the path to achieving flawless concealer comes down to consistent practice. Don’t be discouraged if results don’t look perfect right away. Keep experimenting with different placements, layering techniques, and tip and tricks until you find what allows you to apply and wear concealer effortlessly.
C. Resources for further learning and exploration
From technique tutorials to product recommendations from experts, there are countless resources today’s beginners can explore to continue mastering the art of concealer application. I’d suggest following some of your favorite makeup artists online for inspiration as well as researching reviews and videos to expand your knowledge.
With this comprehensive guide and some persistence, you’ll soon be expertly navigating the world of concealer to achieve a perfected, radiant complexion every single time. It’s an incredibly useful skill worth taking the time to learn. Keep practicing, exploring, and never stop learning!